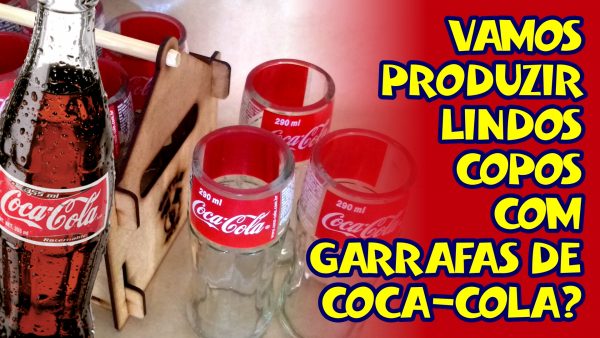
COPOS ARTESNAIS DE COCA-COLA 290ml Nesse vídeo vamos produzir copos artesanais com garrafas de Coca-Cola de 290ml, as famosas KS. Acompanhem todo o processo e as etapas de acabamento. Para a confecção desses copos necessitamos para pelas etapas do processo sendo:
1- Risco no local desejado, que é muito importante para padronizar a alturas dos copos, além disso, também é importante manter esse risco, porque a garrafa de coca-cola tem aproximadamente 6mm de espessura (parede do vidro)
2- Na segunda etapa compreende a abertura da garrafa por imposição de calor, ela é um pouco mais demora que as garrafas convencionais, pelo fato de ser uma garrafa muito grossa, sendo necessário um tempo maior para romper onde foi feito o risco.
3- Após a abertura passaremos ao processo de planificação, lapidação e retirada do fio de corte externo do copo. Nessa etapa utilizo uma lixadeira com lixas teladas (TECIDO) da marca Norton grão 100 para ferro . Essa lixa eu mesmo faço, colando em velcro e intermediando com EVA para amaciamento da lixa.
4- Nessa etapa vamos retirar o fio de corte interno da boca do copo com equipamento que desenvolvi em formato cônico, que promove o lixamento e polimento interno da boca. Também utilizo a lixa de ferro da Norton de grão 100, colada com cola TEKBOND.
5- E por fim aplico o polimento da boca do copo, com lixa 320 de papel sem uso de água. Feito através de lixadeira. Acontecendo esse processo e respeitando todas as etapas, a certeza de um resultado maravilho está garantido, e sem perda de vidro ou garrafa e economizando muito tempo em polimento e lapidação.
Confiram no vídeo todas as etapas que citei acima e vejam o resultado final. . .
Wagner Stapelfeldt
Designer e Artesão em Garrafas de Vidro
Contato para pedidos: WhatsApp 11 9 3800 8578
————————————————————————————————————–
In this video we are going to produce handcrafted cups with 290ml Coca-Cola bottles, the famous KS. Follow the entire process and finishing steps. To make these cups we need to go through the steps of the process being:
1- Scratch in the desired location, which is very important to standardize the height of the cups, in addition, it is also important to keep this scratch, because the Coca-Cola bottle is approximately 6mm thick (glass wall)
2- The second stage comprises the opening of the bottle by imposition of heat, it takes a little longer than conventional bottles, because it is a very thick bottle, requiring a longer time to break where the risk was made.
3- After opening, we will proceed to the process of planning, lapping and removing the outer cutting edge of the cup. In this step I use a sander with screened sandpaper (FABRIC) of the Norton brand 100 grain for iron. I make this sandpaper myself, gluing it to Velcro and intermediated with EVA to soften the sandpaper.
4- At this stage, we are going to remove the internal cutting wire from the mouth of the cup with equipment that I developed in a conical shape, which promotes the internal sanding and polishing of the mouth. I also use Norton grade 100 iron sandpaper, bonded with TEKBOND glue.
5- And finally I apply the polishing of the mouth of the cup, with sandpaper 320 of paper without the use of water. Made by sander. With this process taking place and respecting all the steps, the certainty of a wonderful result is guaranteed, with no loss of glass or bottle and saving a lot of time in polishing and lapping. Check out all the steps mentioned above in the video and see the final result. . .
Wagner Stapelfeldt Designer and Craftsman in Glass Bottles